STAR Voting has its own web app for simple and functional polls. Star.vote is quick and easy to set up, so give it a try. To run an election using paper ballots go to starvoting.us/elections
If you are interested in running a secure and professional election for free, online, Google Forms is the way to go. Without needing to download anything, Google Forms can be customized and set up and run STAR Voting elections by copying and pasting in a simple script. This post is a step-by-step guide for how to do that.
| STAR Elections and the full team at STAR Voting Action respect your privacy and we are committed to ensuring the security of the information you provide as well as the integrity of our elections in general. Read our terms of service and privacy policy here. All of our tools are open sourced to facilitate third party security verification and testing. |
How to create a STAR Voting election on Google Forms
This tutorial sets up a single-winner election or a series of single-winner elections.
If needed, it's easy to turn single-winner results into a multi-winner election. If you need more information on running multi-winner STAR elections please email us at [email protected] and we would be happy to help.
STEP 1: Create a new Google Form for your election
- Go to Google Forms and create a new form.
 |
- Name your form with the name of your election and add your election description. This is a good place to share election details like when they election closes.
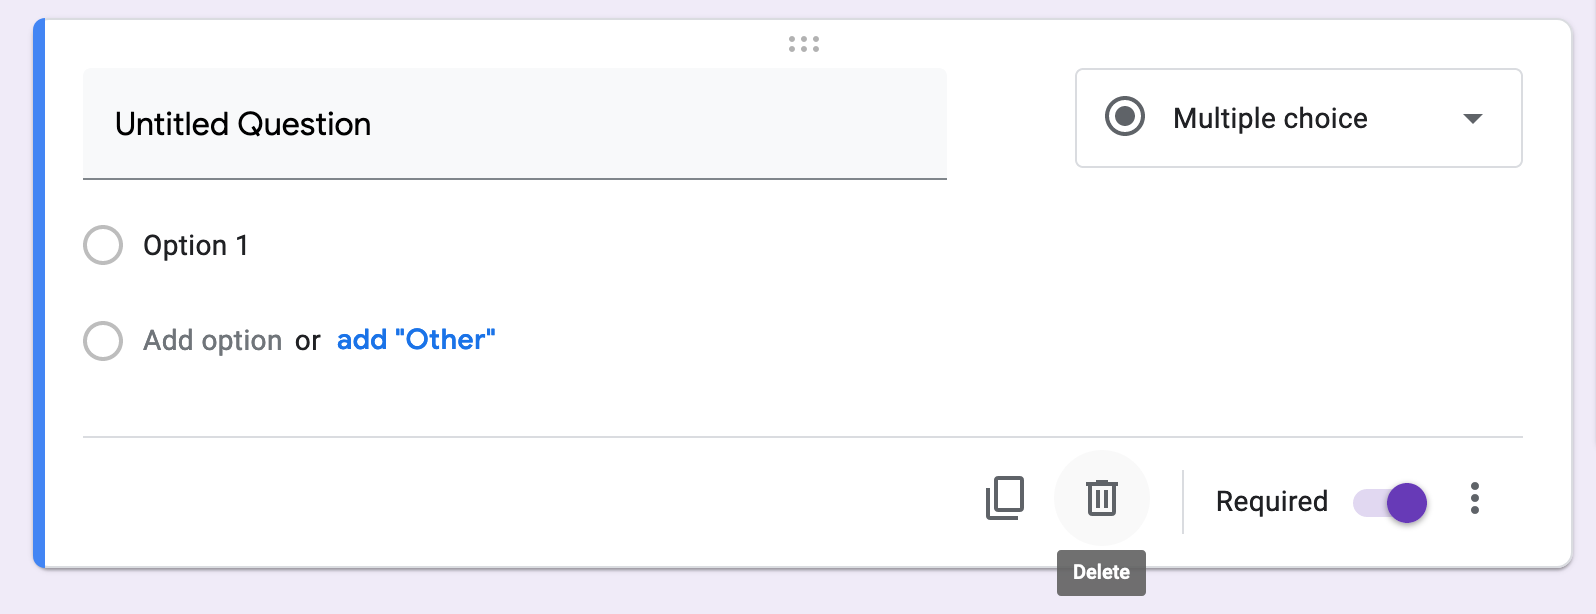
- Delete the "Untitled question" by clicking the trash can icon at the bottom of the image below. The STAR Voting form will only work properly if you don't include questions in multiple choice or other formats.
 |
STEP 2: Open the Script Editor
- From the menu at the top of your screen click on "More" (the vertical "..." in the upper left.)
- Select the "< > Script Editor" option.
- The script editor will open in another tab. This is where you'll put in the custom code to turn your poll into a STAR Voting election.
- Name your Script Editor to match your election's name.
STEP 3: Replace all the code with the 'STAR Voting Calculator' script
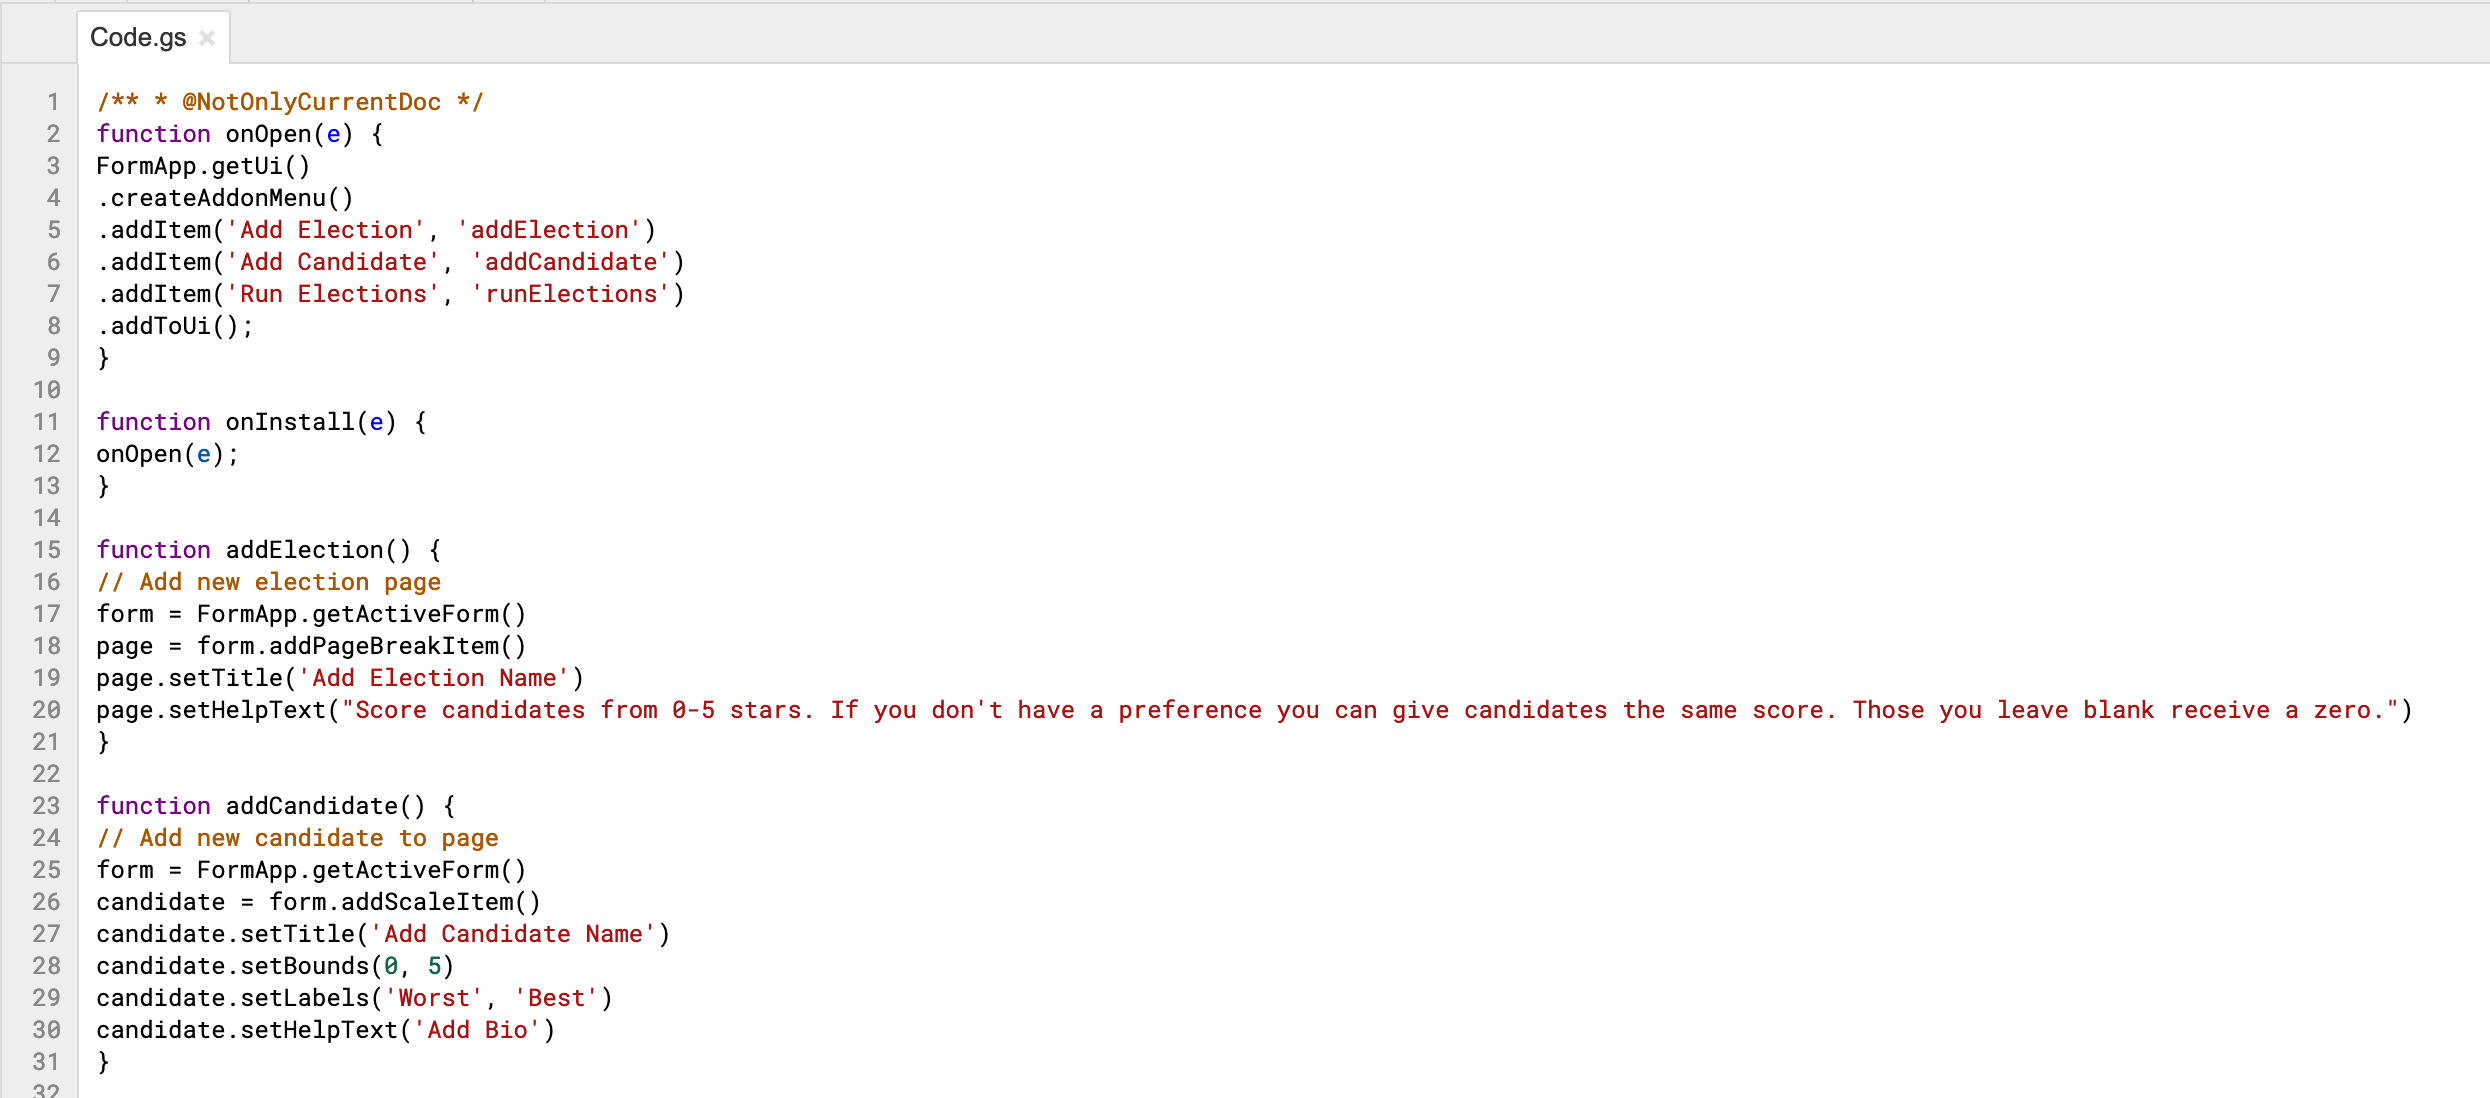
- Copy the following code and paste it in, replacing the few lines of code already in the code.gs script box.
|
/** * @NotOnlyCurrentDoc */ |
- When you're done it will be 177 lines long and will look like this:
- Select "Save" from the File menu.
STEP 4: Add elections and candidates:
- Go back to your form tab.
- Refresh the page.
- Click the "add-on" puzzle piece at the top of your screen.
 |
- Select your script/election name from the options. Click okay and authorize, continue, select your email account, as needed.
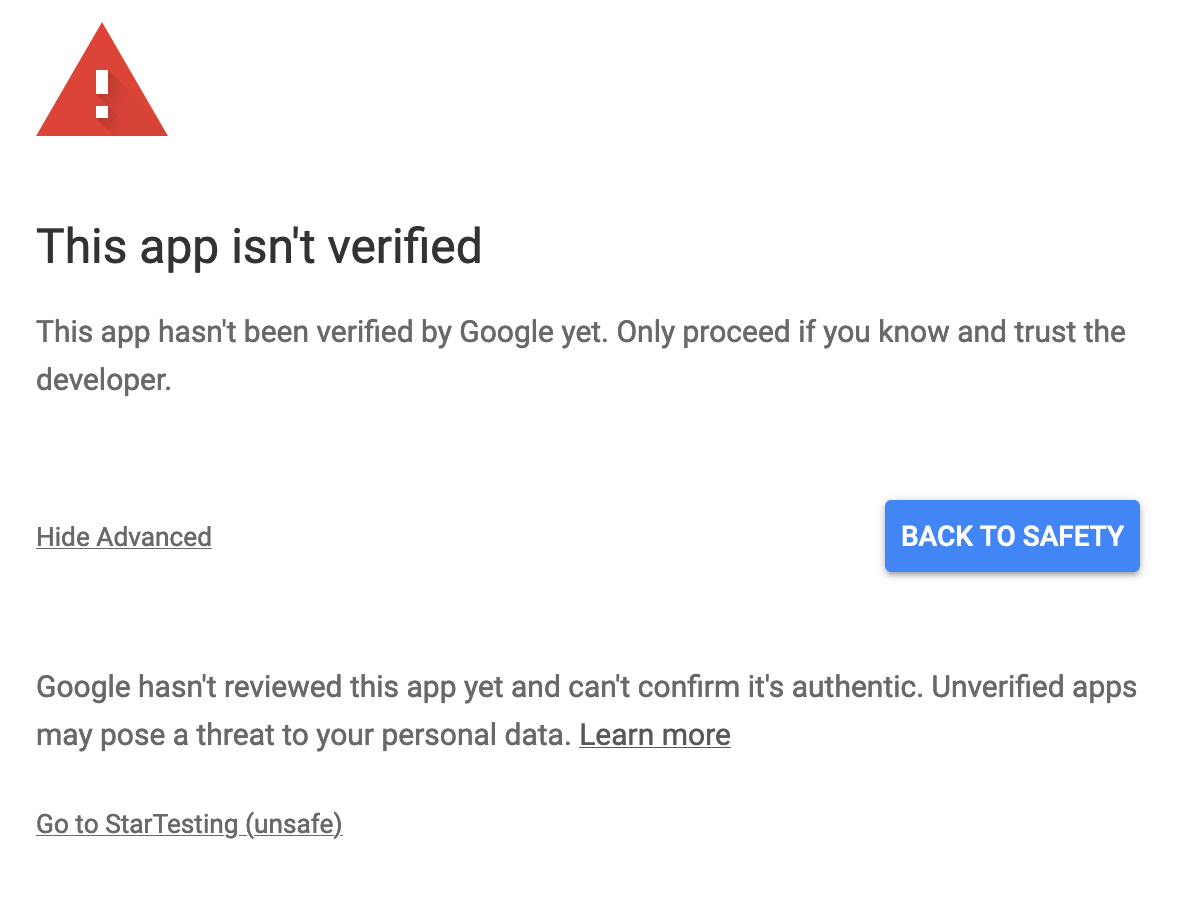
- You will see a warning that the app is not verified. Click advanced. Then from the bottom of the pop-up click "Go to [Your election's name](unsafe)"
 |
- On the next screen click "Allow."
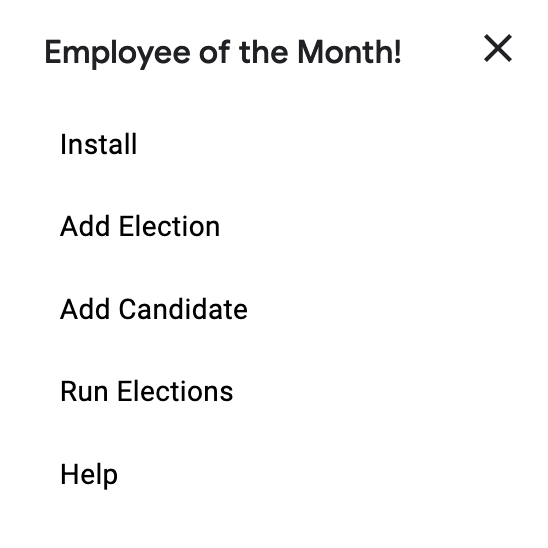
- Go back to your form and click the add-on puzzle piece again.
- Click add election.
|
|
- Each election or race will appear as an additional section on your ballot. Name your election (Example: Tech Team Employee of the Month.)
- Then go back to add-on menu (the puzzle piece) to add a candidate. This will give you a candidate section in your ballot automatically set up with a 0-5 star rating scale.
- Make sure to add at least one candidate before you move on to additional elections. Once you have one candidate set up with a 0-5 ballot it's easy to come back and add candidates later.
|
|

- If your election contains multiple races, go back to the add-on menu and select add election, then add candidate, as above.
- Add as many elections and candidates as needed.
STEP 5: Add names, bios, and details:
- Name your races, add additional candidates if needed, and add candidates names.
- Optional: Bios are a great place to add candidate info like political party affiliation, relevant titles, or to link additional information like a candidate website. You can also add an image for each candidate.
 |
STEP 6: Set your election settings
- Go back to the tab with your election and your candidate entries and click the "Settings" icon in the top right corner.
- For secure elections set the form to collect email addresses, always give vote receipts, and limit voters to one response per email. If desired you can allow voters to edit their vote (up until the poll closes,) or to be able to view the election results as they come in.
 |
- Click over to the Presentation tab for other options like "shuffle question order".
STEP 7: Do a test run before sending out your ballots
We always recommend sending yourself a ballot, casting a test vote, and taking a look at the preliminary results before you send out real ballots:
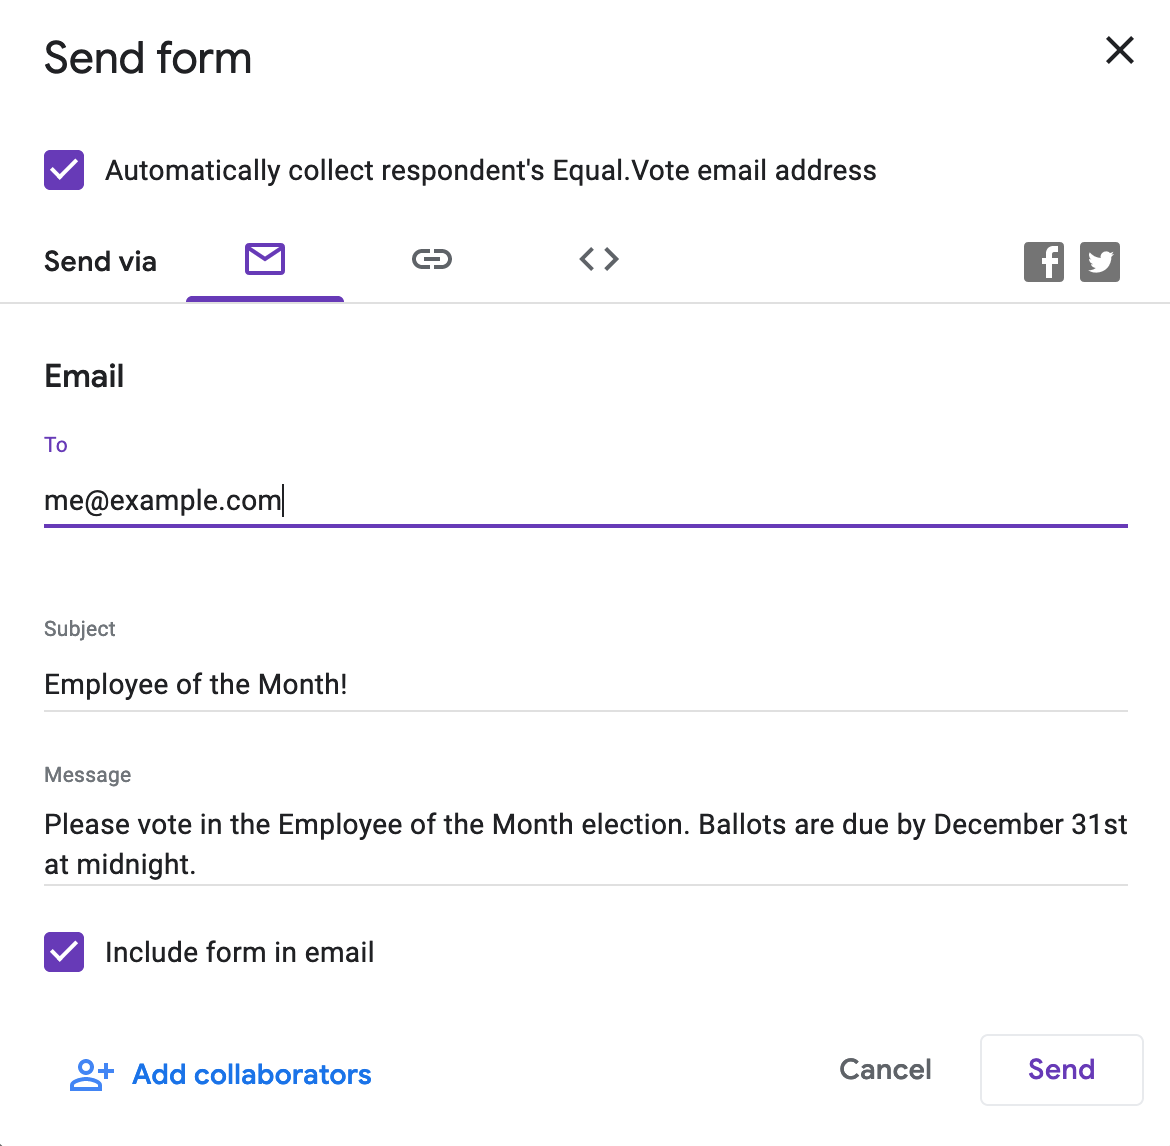
- Go back to the form with your election and your candidate entries and click the "Send" button in the top right corner.
- Select "Send via email" and put in your own email address.
- Add in your message to voters. Ask people to vote, let them know when the election deadline will be, and include any other information that you'd like to have at the top of the email along with the ballot or ballot link.
- Copy and save the message text somewhere convenient so you won't have to retype it when you send out the ballots for real.
- Hit send.
- Go to your inbox, open the email, check that everything looks the way you want it to, and cast a test vote.
|
|
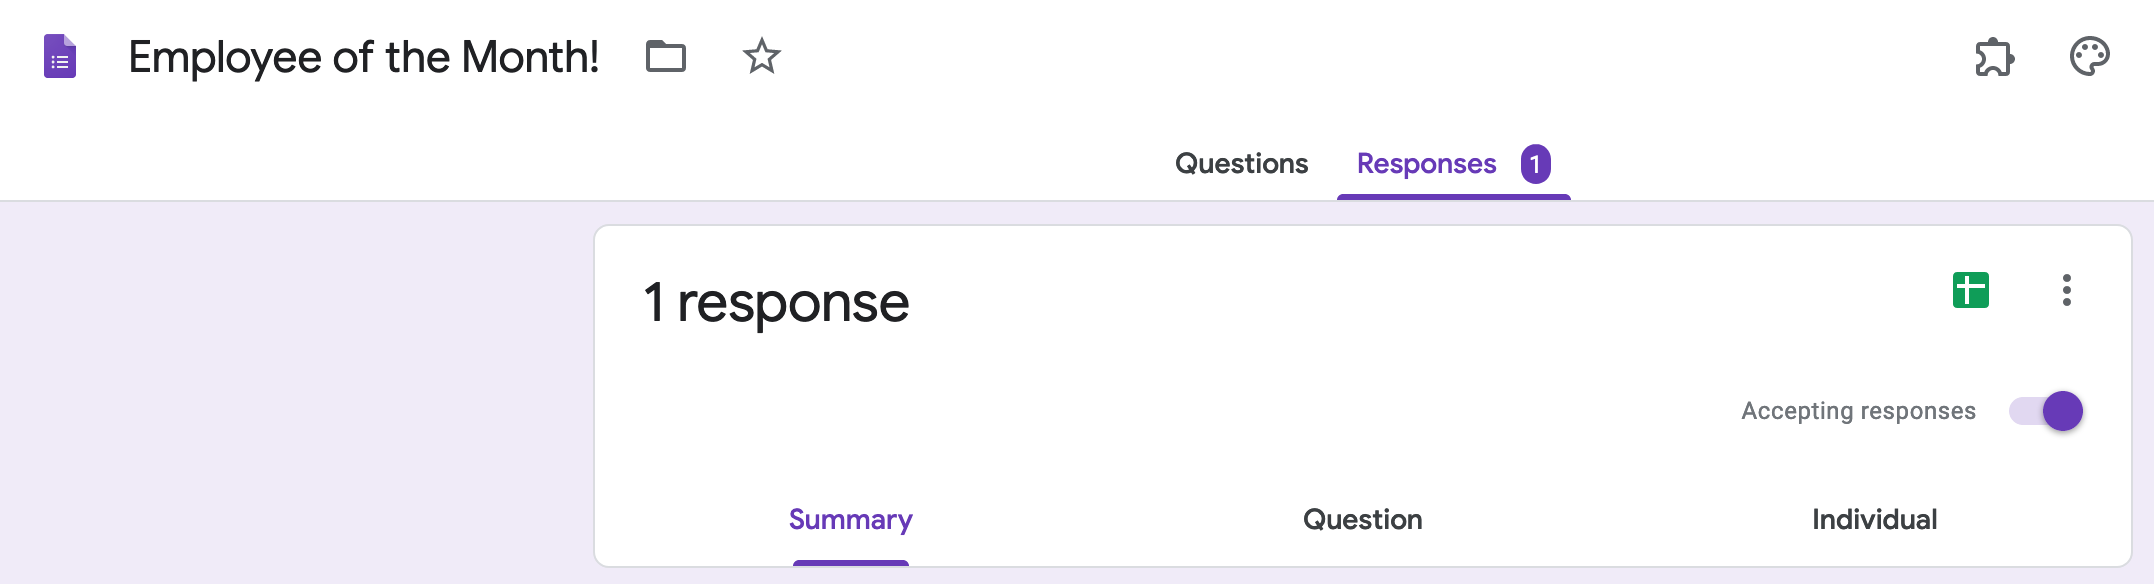
Once you've voted, your vote will be listed in the preliminary election results. If you aren't eligible to vote in the election you'll want to delete your test ballot before the election goes live:
- Go back to the tab with your election.
- At the top of the page select "Responses."
- Then click on the green Google Sheets icon near the top right of the page.
- Click "create new spreadsheet," and then click "Create."
- Delete your vote if desired.
 |
STEP 8: Send out the real ballots!
You can use email to send the ballots out to each eligible voter on your list, you can distribute a link to the ballot form, or you can embed the election form into your website.
- Go back to the tab with your election itself and your candidate entries and click the "Send" button in the top right corner.
- Paste your eligible voter email list in the "Email" section.
- Select the options you prefer, draft or paste in your message. (Your message should ask voters to vote, let them know the deadline, and inform them of any other relevant information they should know before participating in the election.)
- Hit "Send."
STEP 9: Run the election
- At the top of the screen, click on the puzzle piece icon again and select your election's script editor.
- Click "Run Elections"
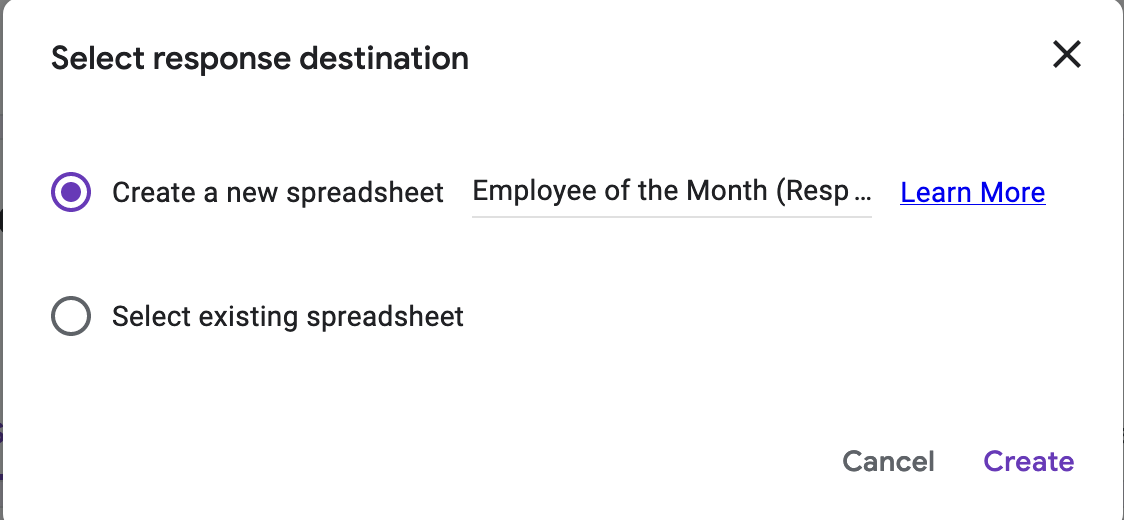
- Select response destination - Create new spreadsheet. Click create.
 |
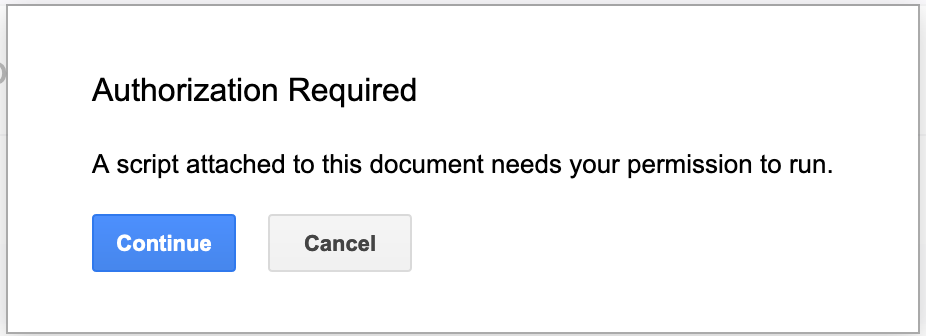
- Google will ask you to authorize the script to run on Google Forms and Google Spreadsheets. Click continue, select your email account, and when you get to the screen below select "Advanced." then "Go to [your election's name here] (unsafe)" Then click "Allow."
 |
 |
- The STAR Voting Calculator script creates a Google Sheet spreadsheet with the results of the election. You can find it in the "Recent" files section in your Google Drive Sheets. This is not the same as the responses spreadsheet, and is named "Results"
- Open the spreadsheet and see the results!
Do you like this page?